Wavve is web-based software that lets you create a video from audio so you can share it on social media.
We’ve all seen the stats. 5 billion video views each day. Users watch 4,146,600 YouTube videos daily and more than 1 billion videos get viewed each day on TikTok. Just this year, TikTok became the most visited site on the Internet.
In this article
- How To Use Wavve (The Easy Way)
- Step 1. Sign Up at Wavve
- Step 2. Create Your Design
- Step 3. Add Your Audio
- Step 4. Download Your Video and Share
- How To Use Wavve (Advanced Settings for Professionals and Experts)
- Step 1. Design Your Own Template
- Step 2. Add Your Audio from an RSS Feed
- Step 3. Transcribe the Audio and Add Captions
- What do Wavve Videos Look Like?
- Upgrading Your Account, Wavve Pricing Options
- Who is Wavve For?
Social Media Week shares that 78% of people watch online videos every week, and 55% view online videos every day. In fact, that 54% of consumers want to see more video content this year.
The challenge is that many creators, from musicians to marketers, public speakers to church pastors don’t have an easy way to post their audio content to social media platforms.
You see, social media platforms from TikTok and Instagram to Facebook and LinkedIn are all visual mediums and only allow you to post three of the four types of media; text, photos and video.
Have you ever asked yourself; How do I convert audio to video? Wavve is a service that turns audio files into videos for sharing on social media.
But, how do you upload an audio clip? Wavve solves this problem by creating a simple web app that let’s you convert your audio file into a video.
Let’s see how it works.
How To Use Wavve (The Easy Way)
If you’re a musician, podcaster, author, marketer or even a public speaker or church pastor, then Wavve is the social media tool you’ve been waiting for. Now, it’s easy to publish your audio content to social media sites, share important information with your audience and grow your community.
Here’s how to get set-up with Wavve.
Step 1. Sign Up at Wavve
Signing up at Wavve is easy. You just need to enter your email address and pick a strong password. They do ask you to identify what type of user you are, likely for marketing purposes as I couldn’t see how my selection changed my experience. The options were clear, so pick one that best reflects who you are and move on.
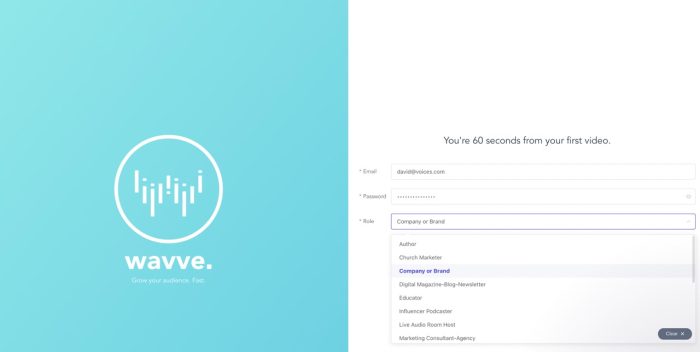
You’ll also need to verify your email, so head over to your inbox, be it Gmail, iCould or wherever you get your email and click the link to verify. Now you’re all set to actually use Wavve.
Step 2. Create Your Design
To create your first video, you just need two things: a design and audio.
The design includes a waveform which is animated when you generate a video.
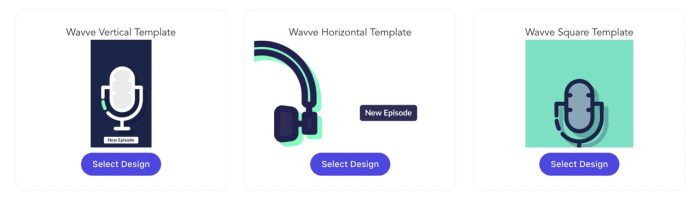
There are three designs to choose from:
- Wavve Vertical Template – Ideal for TikTok, Instagram Videos and Reels and Snap
- Wavve Horizontal Template – Great for YouTube and LinkedIn
- Wavve Square Template – Perfect for Facebook, Instagram Posts and LinkedIn posts
If you’re just getting started with templates check out this quick video on how they work.
Step 3. Add Your Audio
Choose from your latest podcast episodes, upload an audio file, or record something on the spot.
Wavve gives you four options for adding audio and converting it into a video. Pick from:
- RSS
- Upload
- Record


If you have a file on your computer or a recording in the Voice Memos app on your phone, I suggest using the upload feature. Wavve upload accept mp3, mp4, m4a, wav, and other common audio file formats.
In this example, I uploaded a recording of the 100th episode of our podcast, Vox Talk, hosted by our Co-Founder Stephanie Ciccarelli.
Step 4. Download Your Video and Share
The last step is the easiest, just download the video.
- Go to My Videos
- Hover over the three dot menu for extra options
- Click Download and save the video to your iPhone, Android or on the desktop of your Mac or PC.
From there, you can re-upload the video to your favorite social media platform such as:
- TikTok
- Snap
- YouTube
- Or, wherever your friends and followers are
How To Use Wavve (Advanced Settings for Professionals and Experts)
For those audio-first creators, you likely can see yourself needing an app like this and using it often (weekly or even daily). If you fall into this camp, let me walk you through a few of the more advanced features.
Step 1. Design Your Own Template
Instead of using Wavve’s pre-fabricated horizontal, vertical or square templates, you can create your own template with a unique design including customizing fonts, colors and placement of the audio waveform.

As you can see, you can either start with a template and customize from a starting point, or you can begin from scratch, with gives you more flexibility, but requires more effort.
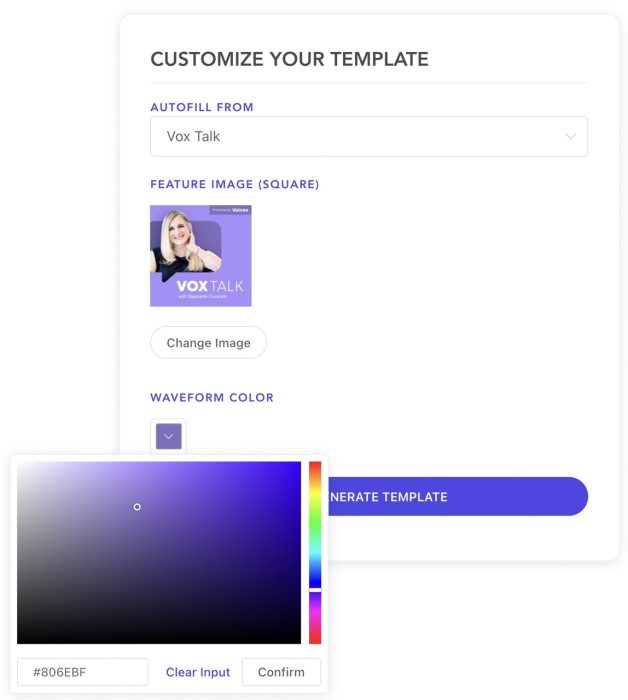
I decided to start with the template and then picked the podcast cover art and episode.
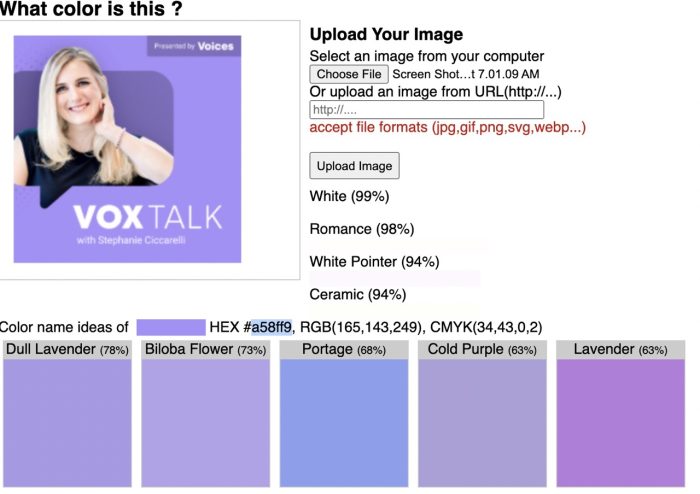
I also used a tool called What Color Is This to find the HEX value of the exact color from the podcast cover art. This allowed the waveform too match the podcast cover design wise.
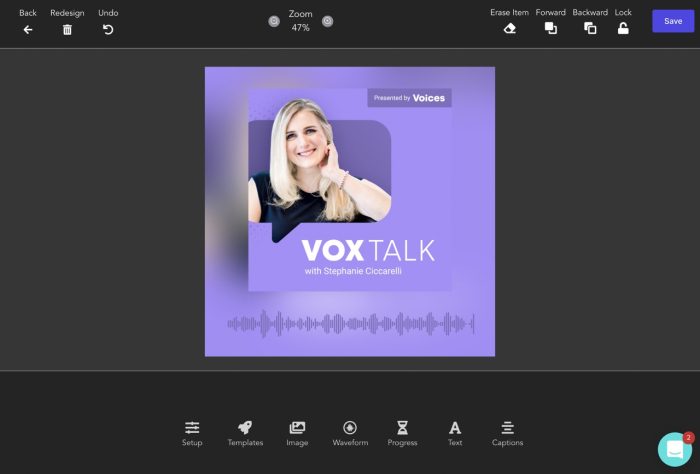
From there, you’ll land on the advanced editor to customize much more of your template. No need to go into all the details now, so if you’re eager to post your first video, skip this and come back later to edit your custom Wavve template.
Step 2. Add Your Audio from an RSS Feed
We covered the three ways to add audio earlier, but for this tutorial, I’m going to pick the RSS feed.

What is RSS? RSS stands for Really Simple Syndication and is a publishing format that podcasters use to structure their show and each episode with all the data that a podcast app such as Apple Podcasts, Spotify Podcasts or Google Podcasts needs, including the podcast name, author, cover art, episode name and most importantly a link to the audio file.

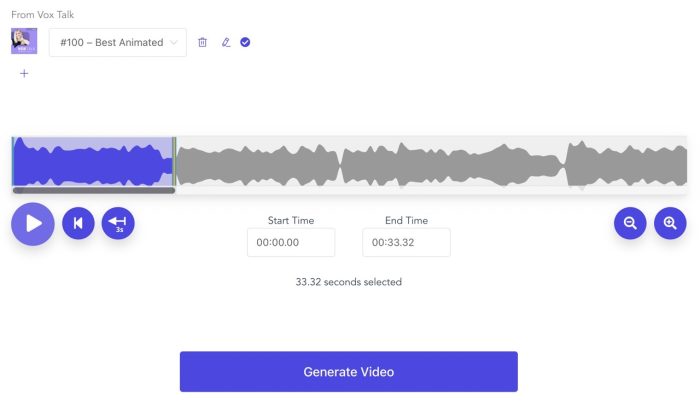
Once the feed has been validated, you have the option to select which episode you want to convert into a video. I found the drop down menu easy to use, and if you number your podcast episodes like we do, it’ll be easy to identify which episode to pick.
With the feed added, Wavve game me a neat drop down allowing me to pick the exact episode I wanted to convert into a video. Once the audio was process (which was so fast I couldn’t take a screenshot of the progress bar), you’ll be presented with a waveform that you’ll need to edit.
Of the whole experience, this step is likely the trickiest. Even as a trained audio engineer and someone who went to the one of the top audio engineering schools in North America, the user interface gave me pause. Others may have challenges here, so I’d encourage the team at Wavve to further simplify the UI/UX of this step.
By clicking and dragging on the audio bar, you can highlight the section of the audio you want to convert into video.
Select up to 120 seconds, or upgrade to any of our paid plans if you’d like to make longer videos.
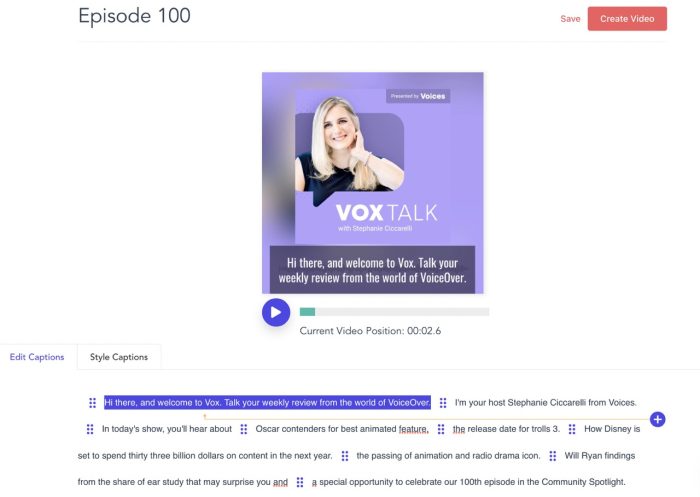
Step 3. Transcribe the Audio and Add Captions
From the My Videos page, you can click the Transcribe option to add captions to your video.
Why do you want to add captions? A survey of U.S. consumers found that 92% view videos with the sound off on mobile and 83% watch with sound off, according to a new report from Verizon Media and ad buyer Publicis Media. With this in mind, it’s best to use this feature to transcribe your videos to generate interest and encourage the viewer to turn the sound on.
What do Wavve Videos Look Like?
Wavve invites you to check out their Instagram for some inspiration which I did. Below is a screenshot of some samples, however it’s best to visit Instagram so you can see the animation in action.
Upgrading Your Account, Wavve Pricing Options
With the free plan, can create 2 minutes of video. It was unclear if this is 2 minutes of video per month or forever. If it’s per month, then infrequent users who create a single 30 second clip once per week will do fine with the free plan.
For those users, the social media influencers, brand marketers, musicians and more who have audio content that is longer than a couple of minutes, or you see yourself posting audio centric videos more than once per week, then a paid plan is best for you.
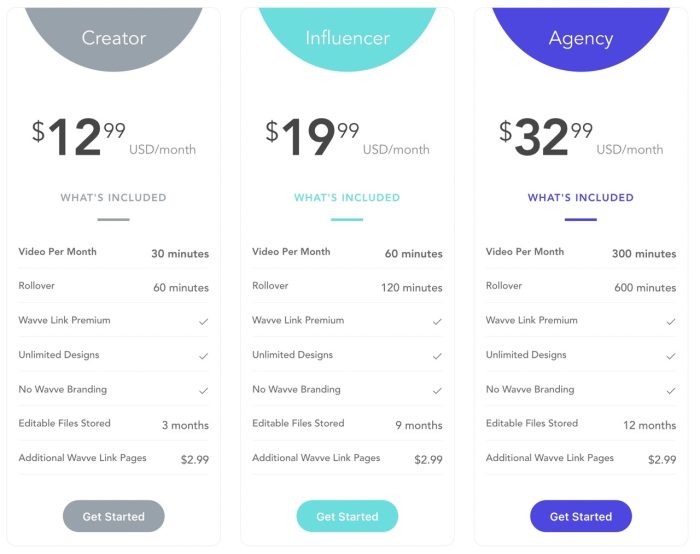
The plans seem reasonably priced, especially if you’re see yourself as an audio-first creator.
Who is Wavve For?
Wavve is a great audio marketing tool for a wide audience of audio creators.
- Author
- Blogger
- Church Volunteer
- Company or Brand
- Educator or Teacher
- Influencer
- Live Audio Room Host or Moderator
- Live Streamer
- Marketing Consultant
- Media Company
- Music Producer
- New Podcaster
- Podcast Production Company
- Radio Station Show Host
- RecordLabel
- Signer or Musician
- Speaker
- Voice Actor
If you see yourself in the list, consider giving Wavve a try and start growing your social media following today.
Leave a Reply